“FolioTrader - Domain Portfolio Seller Script” Documentation by “crivion” v1.0
“FolioTrader - Domain Portfolio Seller Script”
Created: Aug 2016
By: Alex Crivion
Email: [email protected]
Thank you for purchasing my script. If you have any questions that are beyond the scope of this help file, please feel free to email via my user page contact form here. Thanks so much!
Table of Contents
- Installing database
- Installing the script
- Configure Admin Credentials
- Configure Title, Analytics, etc.
- Configure Payment API's
- Configure Navigation
- Manage Domains
- Manage Orders
- Manage Pages
A) Installing the MySQL Database - top
- Go to your hosting Control Panel and point to the database manager
- Create a MySQL database and ASSIGN a MySQL User to it.
Go to phpMyAdmin and select the database you've just created.
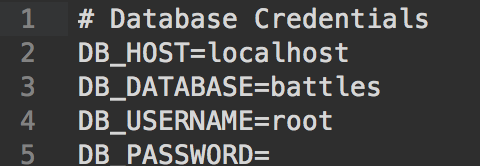
Import the file located into "database/foliotrader.sql" folder. - Step two is to open .env (located in the root/main/parent folder of the script) with any text editor and update mysql database connection info
- Note: .env file or .htaccess file ( dot files ) might be hidden in your operation system.
You can reveal them depending on the OS you're using.
LINES 1 TO 5
B) Installing the Script - top
- Connect to your hosting and upload the extracted zip file folder of the script to your domain. (must be under either root or subdomain. No subfolders please.)
- Make sure .htaccess file is included otherwise the script will mallfunction as the file is required to do the mod_rewrite SEO friendly URL's job
C) Configure Admin Credentials - top
- Open .env file with any text editor and update and the same you did for the database file update admin username and password.
- For the admin credentials edit lines 5 & 6
-
Admin panel url is your-site.com/admin/login

D) Configure Title, Analytics, Contact Email, etc. - top
- Navigate to your-website-url.com/admin/login and login with the credentials you've just configured earlier at step C).
- Point to "Configuration" tab
- You will see a nice & complete form with options to set the following: SEO Title, Meta Description & Keywords, Insert Analytics Code (like Google Analytics JS Snippet, etc), Contact Email (for the contact page form) and homepage related configuration options.

D) Configure Payments API - top
Folio.Trader supports two gateways for taking payments:
- Stripe
- PayPal Express Checkout
STRIPE API
- Step one is to go to Stripe account settings


- Step two is to open .env (located in the root/main/parent folder of the script) with any text editor and update Stripe API Keys
- Note: .env file or .htaccess file ( dot files ) might be hidden in your operation system.
You can reveal them depending on the OS you're using.

PayPal Express Checkout API
You have to be signed up in Paypal Developer Program ( Paypal Developer ( Express Checkout ) )After that, create a REST API app and obtain PayPal Client ID & Secret.
- Last step is to open .env (located in the root/main/parent folder of the script) with any text editor and update PayPal API Keys
- Note: .env file or .htaccess file ( dot files ) might be hidden in your operation system.
You can reveal them depending on the OS you're using.

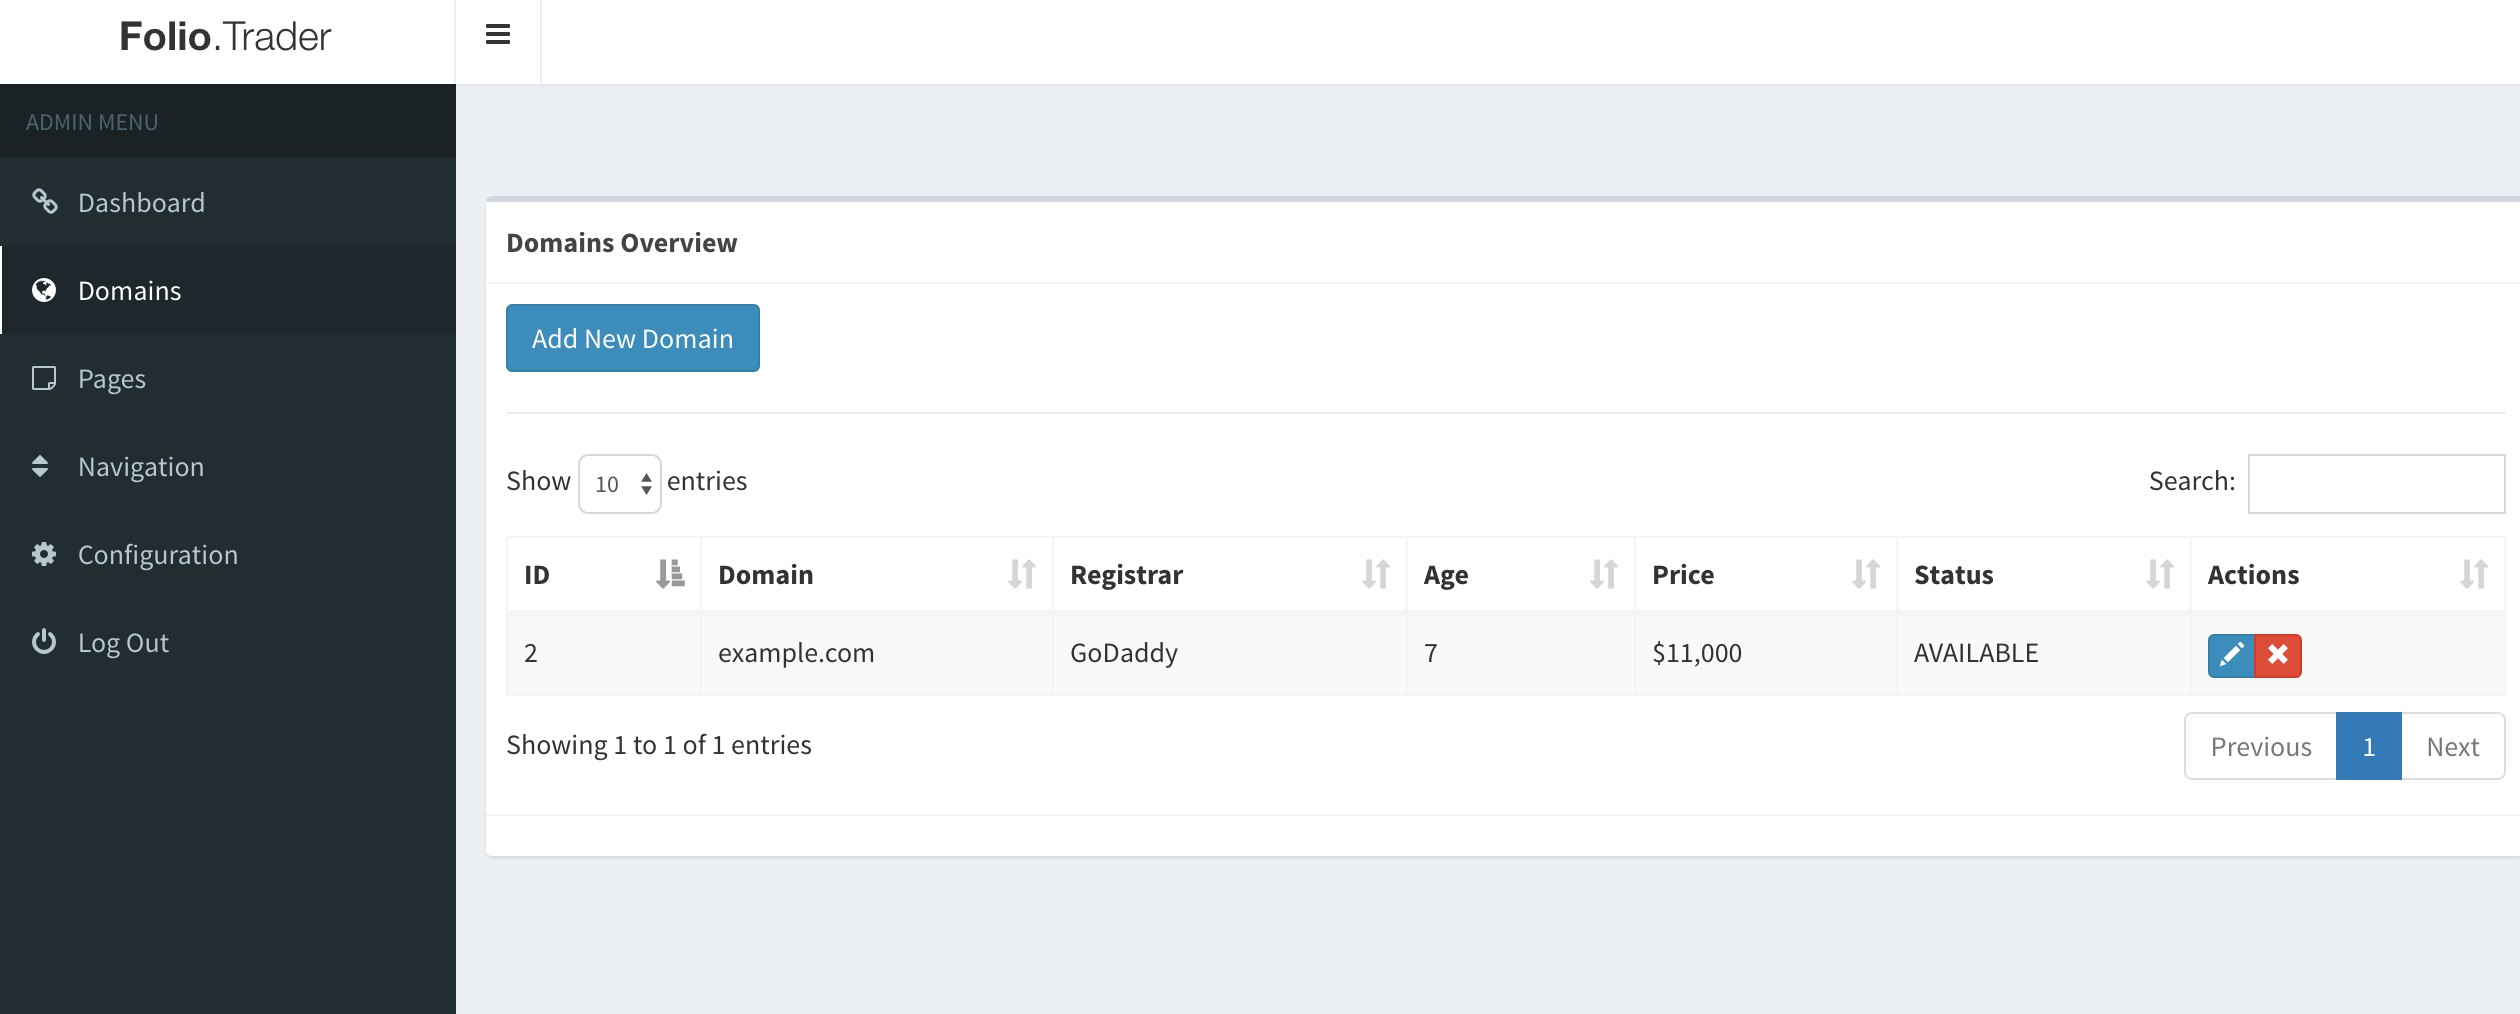
E) Admin : Manage Domains - top
- Navigate to your-website-url.com/admin and login with the credentials you've just configured earlier at step C).
- From the left side click "Domains"
Listing a Domain for Sales
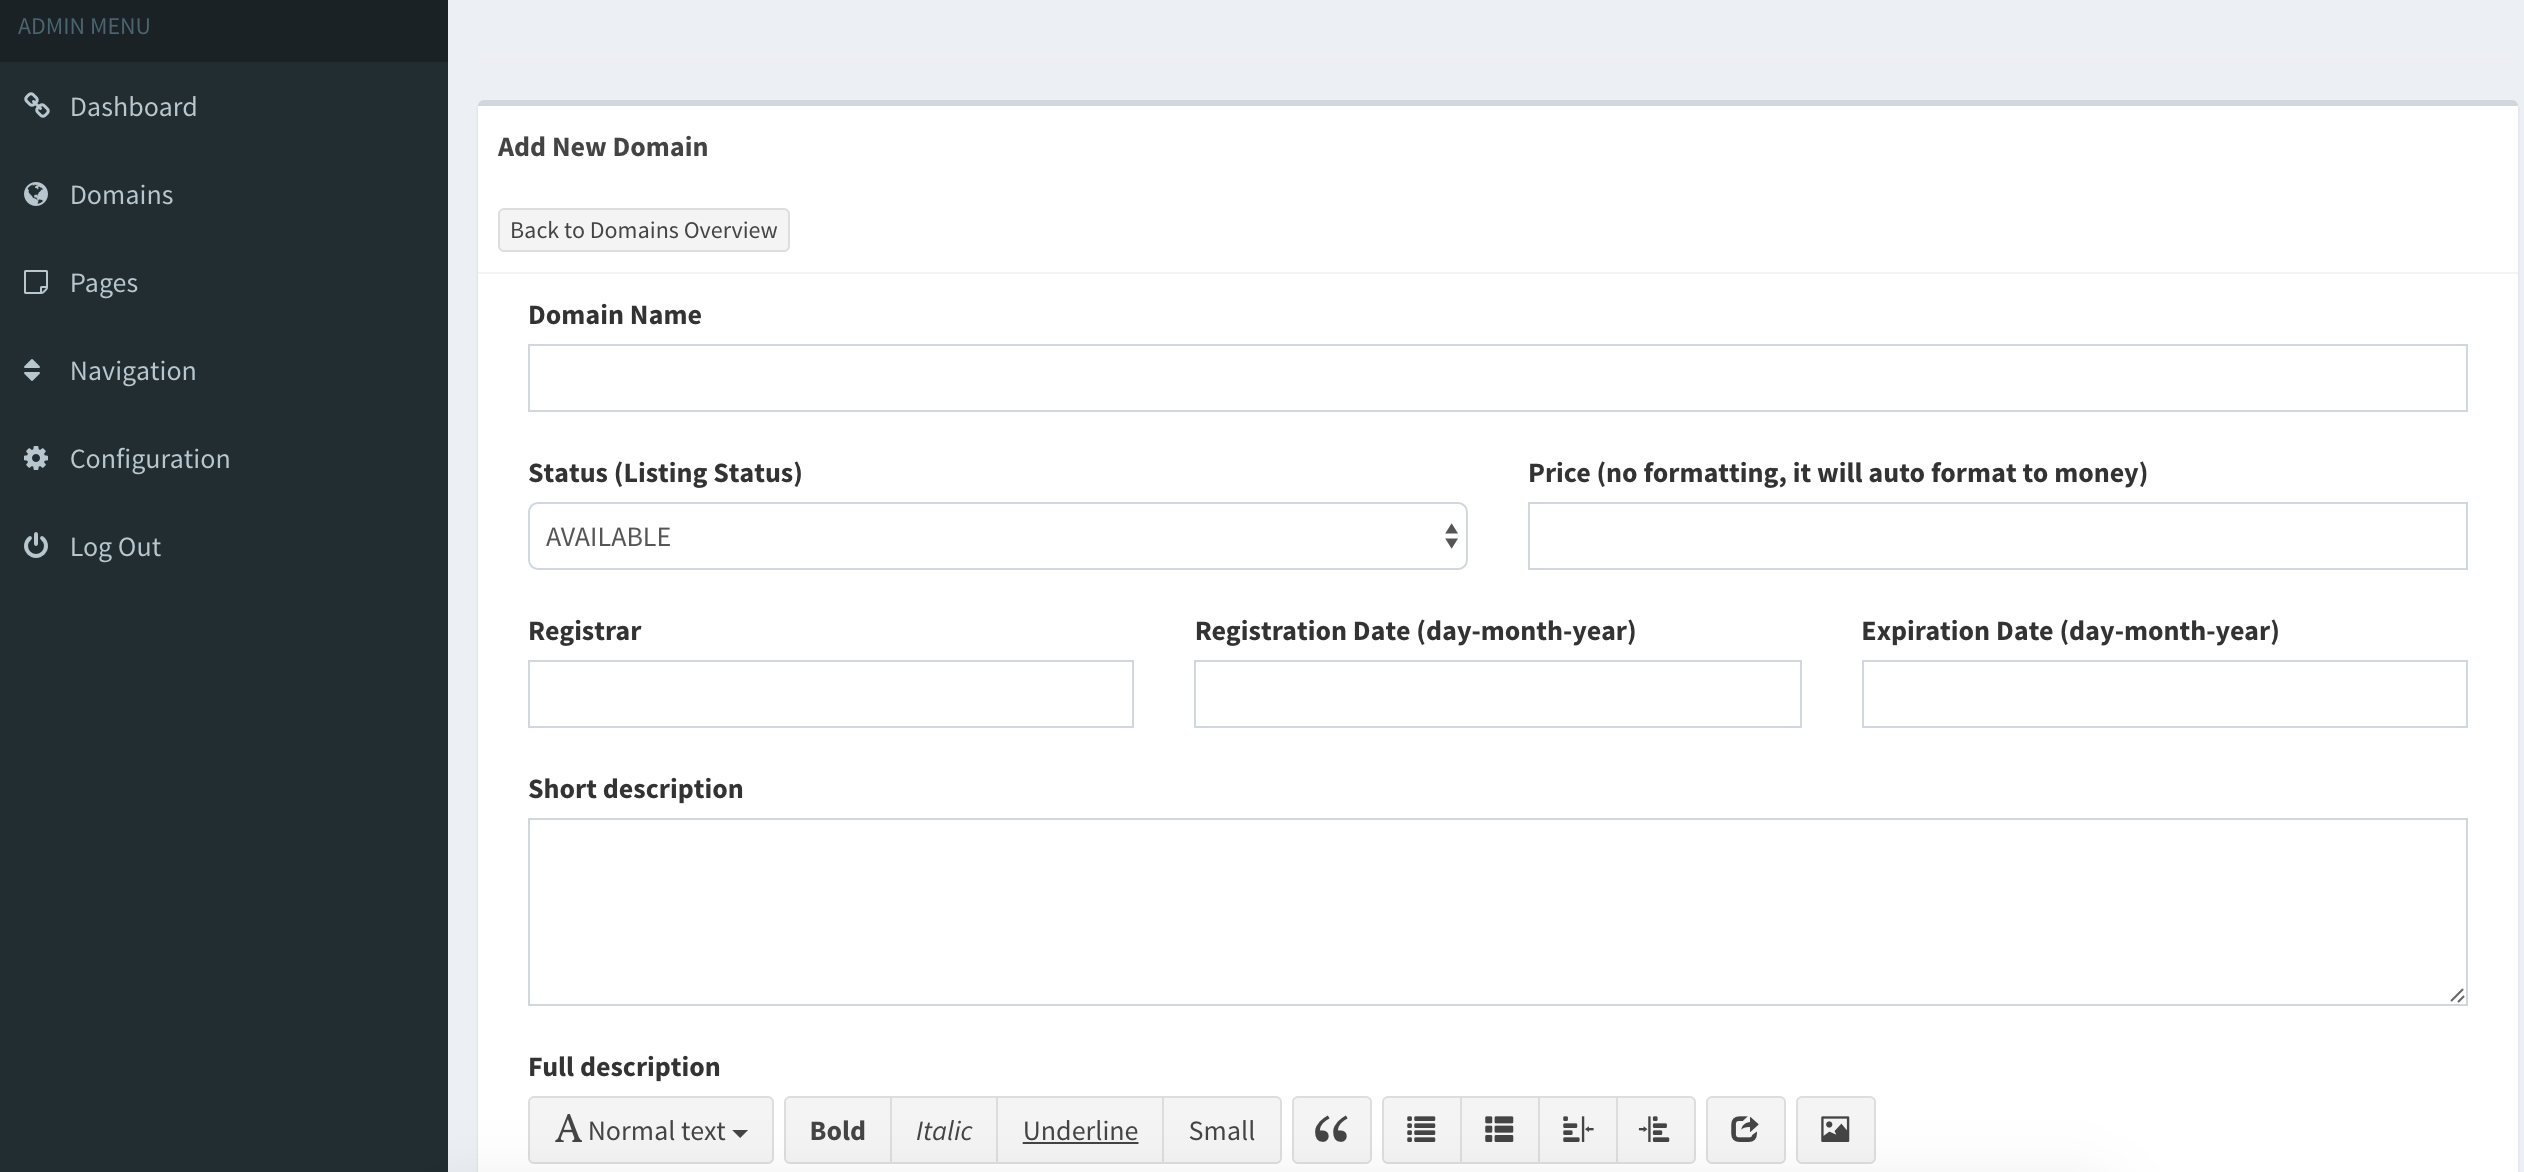
- From the left side navigation click on "Domains" then on the "Add New Domain" blue button before the domain listings.
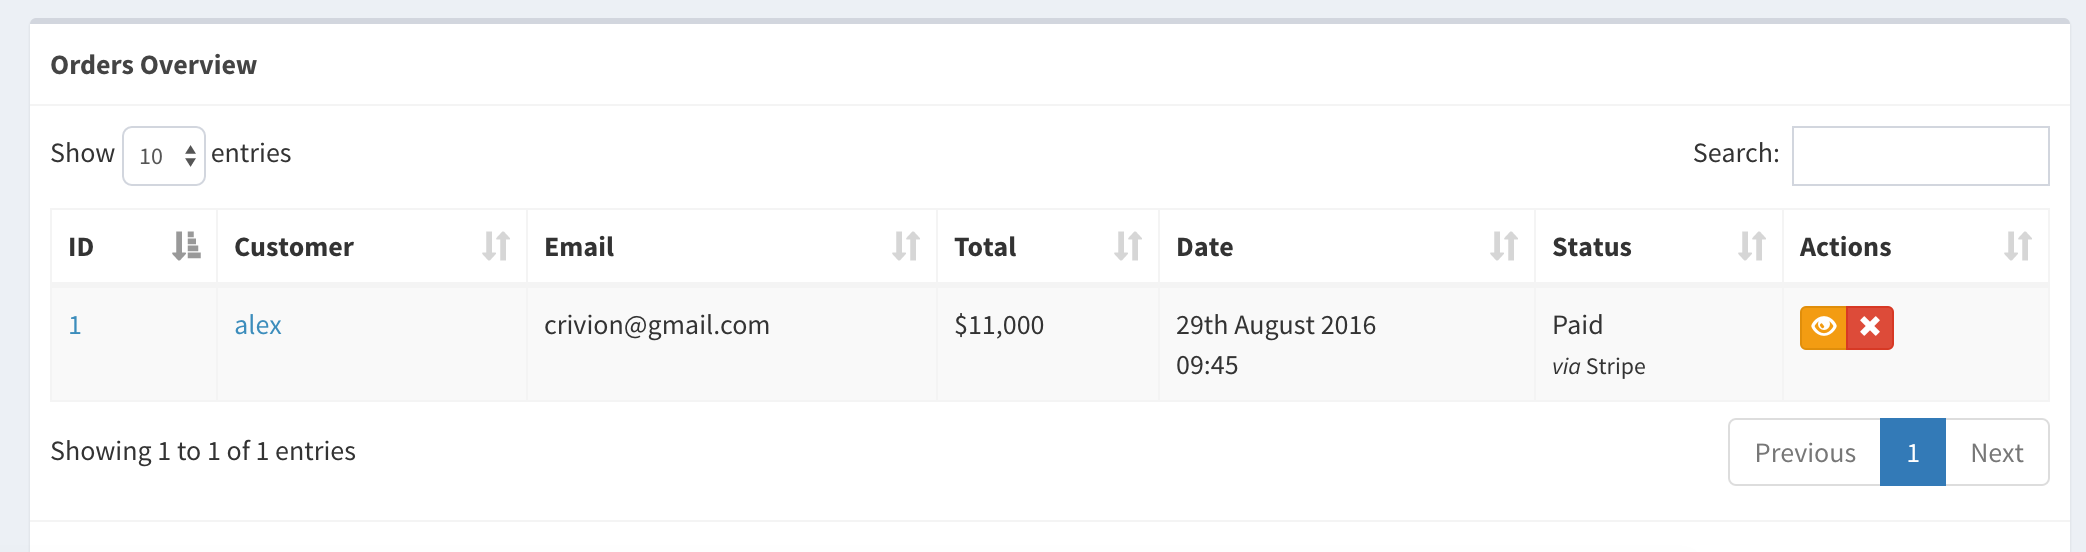
H) Orders Manager - top
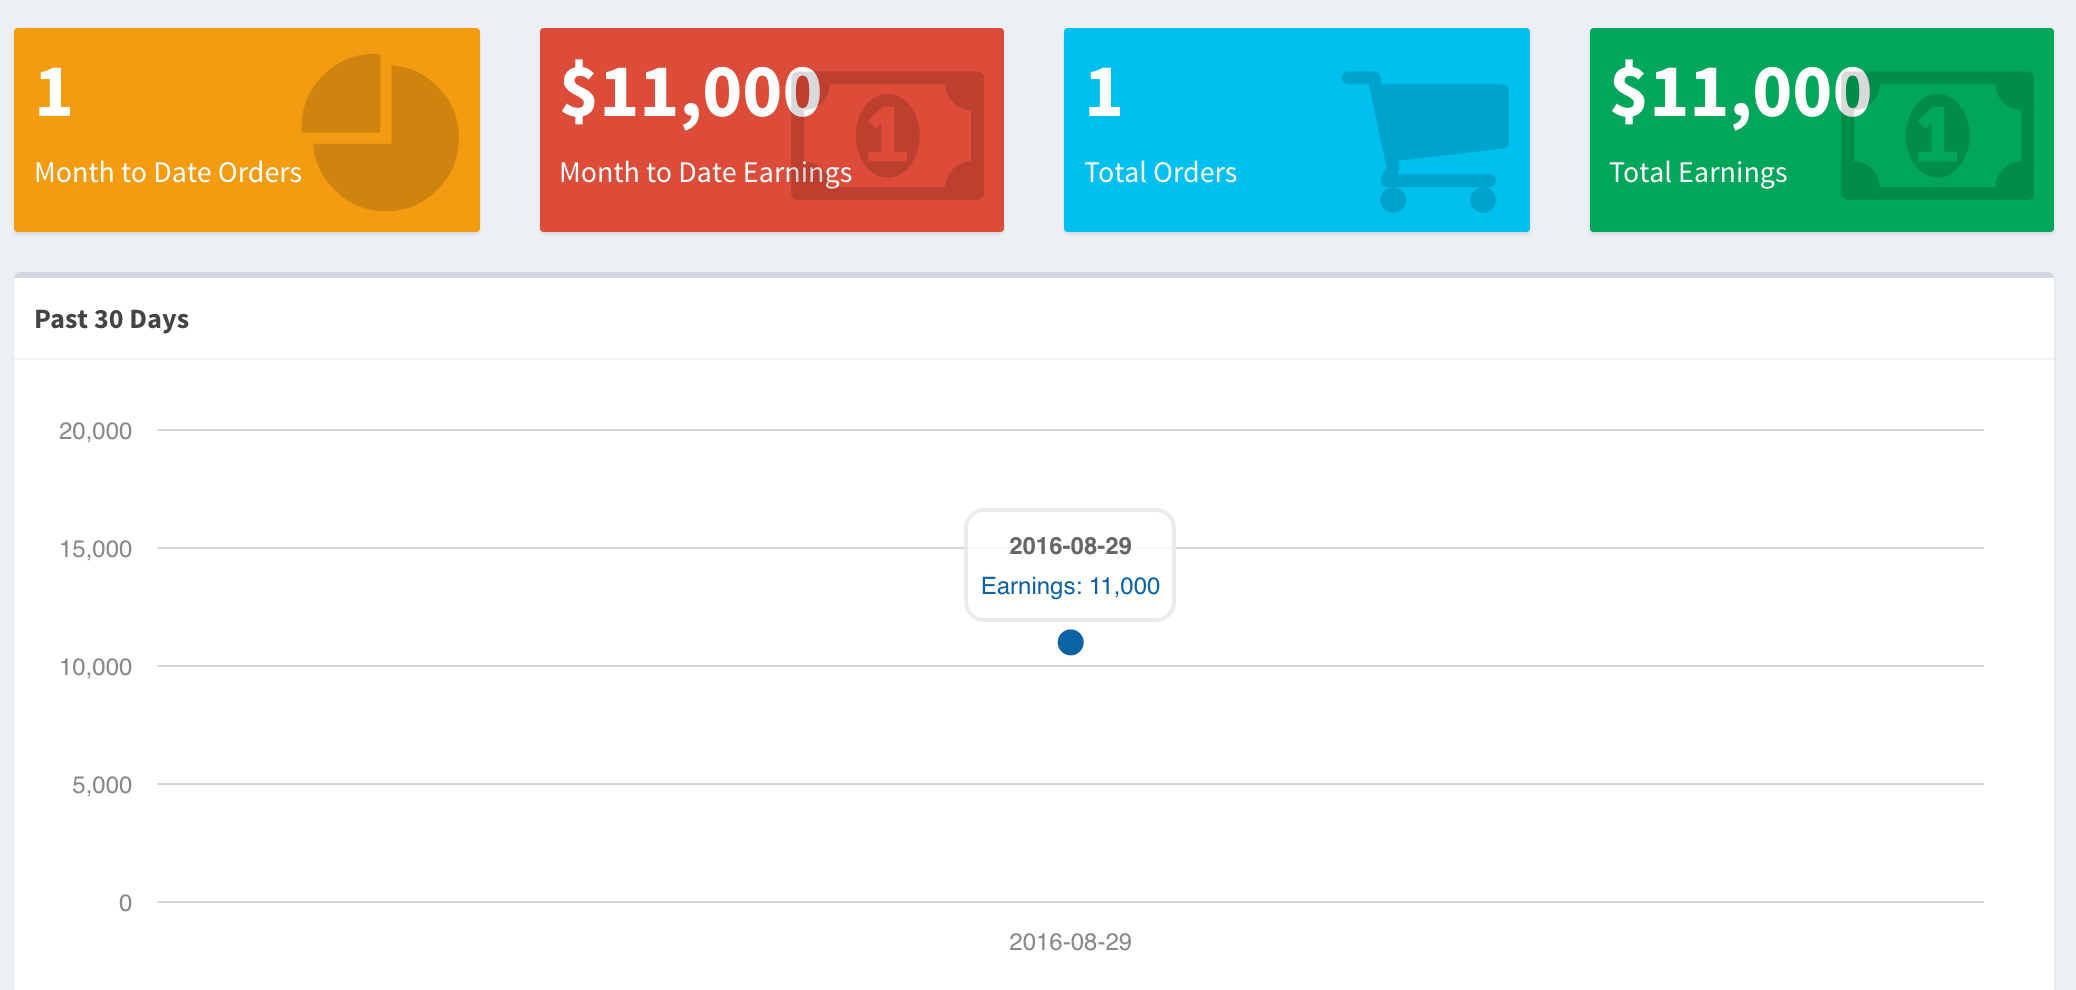
- Navigate to your-website-url.com/admin and login with the credentials you've just configured earlier at step C).
- You will see: financial stats all time & month to date.
- There'll be a table of orders which you can view or remove.
- All fields are sortable and searchable

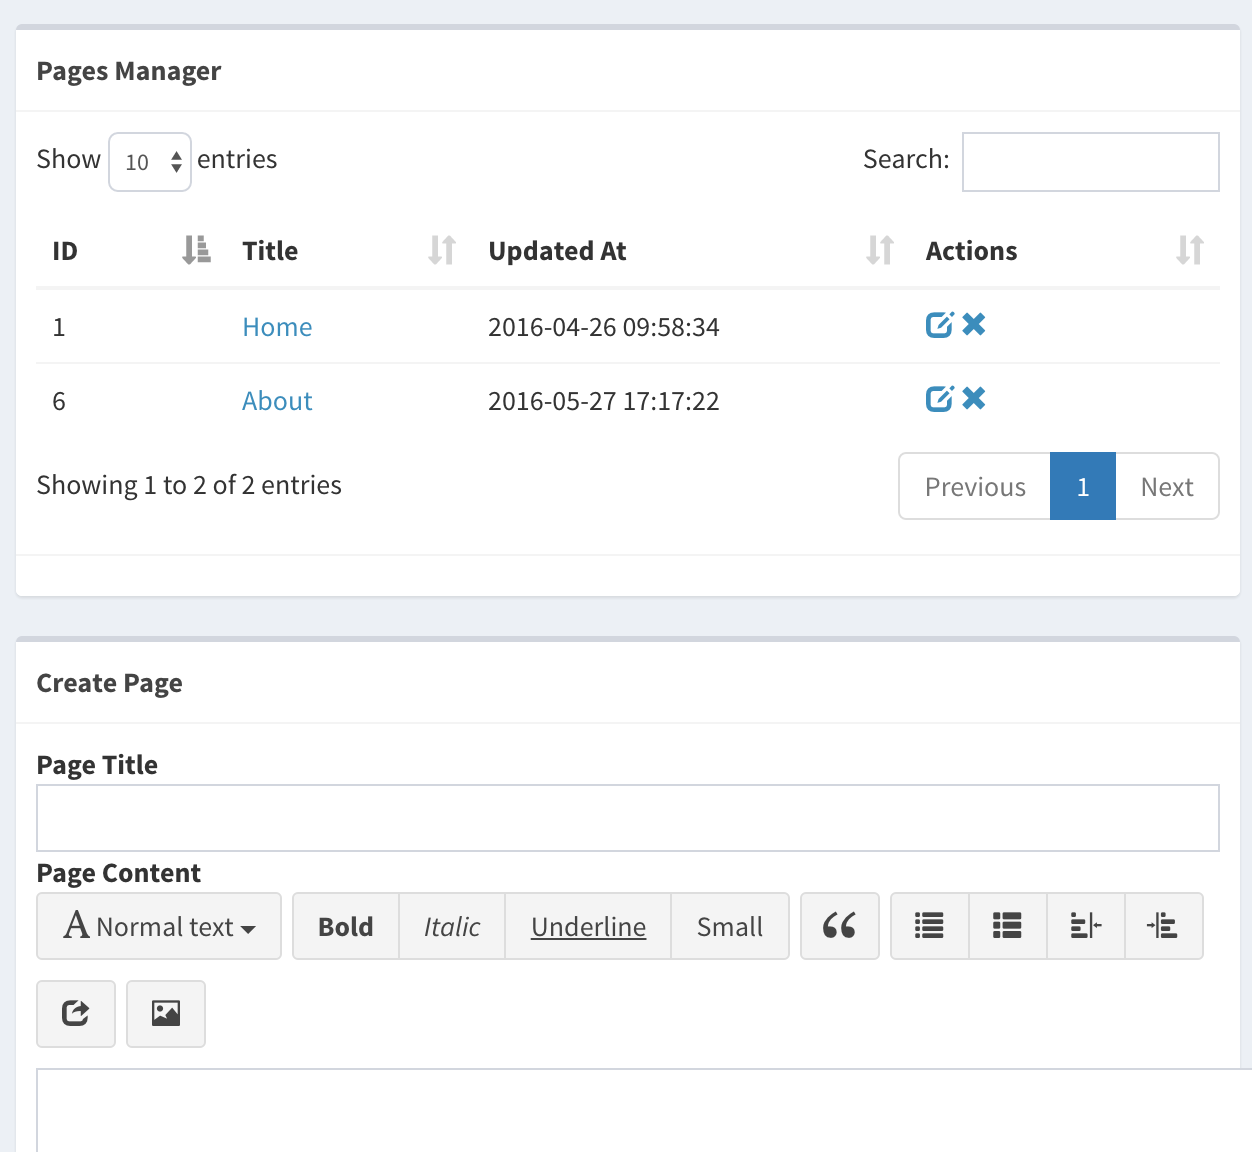
F) Admin : Pages - top
- Navigate to your-website-url.com/admin and login with the credentials you've just configured earlier at step C).
- Point to "Pages" from the left side navigation
- You can manage current pages ( update, delete ) and also create new ones!
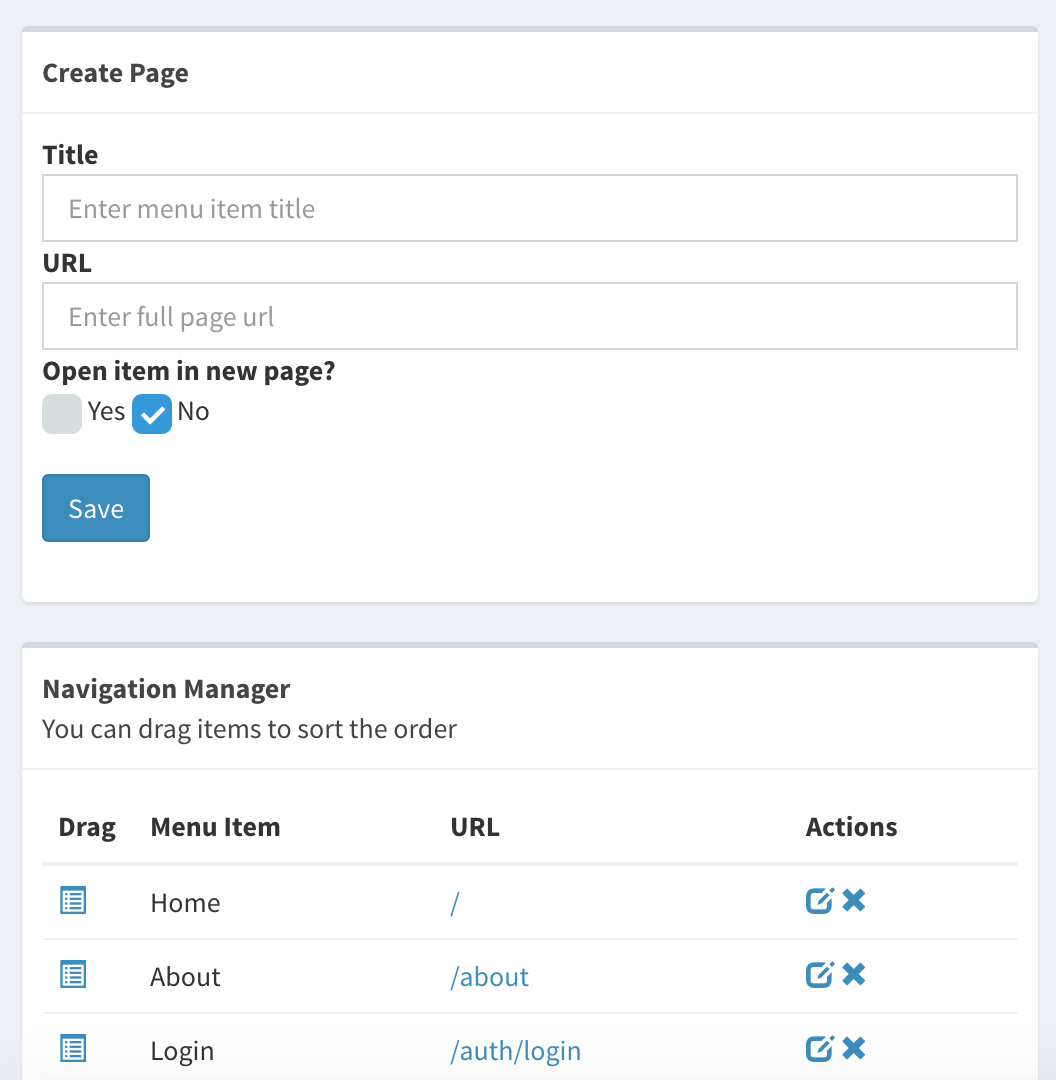
G) Admin : Configure Navigation - top
- Navigate to your-website-url.com/admin and login with the credentials you've just configured earlier at step C).
- Point to "Navigation" menu item from the left side
- You will see a form to add new navigation items and also existent menu items with an option to remove, sort by drag-and-drop and remove item.
Alex Crivion